Users Guide for the APEX SpeedSpy v3.0
First, decide on your set-up options as follows:
a) MPH or KPH speed monitoring. Default is set for Miles Per Hour (MPH)
b) PassCode to be used. Default is 0000. We strongly recommend that another PassCode be assigned.
c) Maximum allowed speed. Default is set at 40 Mph.
d) Speed limit Enforcement or Monitoring only mode*. Default is set for Enforcement.
e) Length of time (1 to 20 seconds) of OverSpeed violation before it is logged in. Default is set for 10 seconds.
f) Sleep Mode**
Set-up and Control Procedure
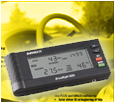
(1) The SpeedSpy set-up and control is accomplished by use of 2 tactile switches (White Mode and Red Enter) and 2 seven segment displays located on the enclosure front panel.
(2) If the SpeedSpy has been disconnected for more than 15 seconds, it will display P0 (the 0 will be flashing) when it is reconnected. This is the prompt to enter the PassCode. It must be done within 15 seconds or a Tamper Detected (td) will be registered.
Initially, you MUST use the default PassCode of 0000 to get access to the set-up and control procedure. At this point we suggest that you go to Mode 6 and enter your new PassCode (we recommend that you not retain the default PassCode!).
This is done by pressing the Enter and Mode switches at the same time and releasing. The response is a Beep and the display of P0 with a flashing 0 (the prompt to enter the PassCode) press Enter 4 times and the default PassCode of 0000 will be entered. If an incorrect PassCode is entered, the letters Er for Error will be displayed. After 3 incorrect PassCode entries, a PassCode recovery code consisting of letters and digits is displayed. This code can be sent to the manufacturer with proof of product ownership and the correct PassCode can be recovered.
This is the procedure for changing the PassCode: After the correct PassCode is entered, Cd will briefly be displayed and then 3 horizontal lines and a flashing 0. This is the prompt to select 1 of 7 (0 through 6) set-up Menus. Press the Mode button until 6 is displayed and then press the Enter button a flashing 0 will again be displayed. To change the PassCode to, for example, 0736, press the Enter button for 0 then the Mode button to get a 7 displayed then press the Enter button, then press the Mode button to get the 3 displayed, etc. After all 4 digits have been entered they have to immediately be re-entered before the new PassCode is accepted. This is to ensure that no error was made during the entry.
(3) Set-up Menu Modes:
Mode 0 -> Exit Set-up Mode.
Mode 1 -> View Speed Count
Mode 2 -> View Acceleration Count
Mode 3 -> View Deceleration Count
Mode 4 -> Reset Speed Limit
Mode 5 -> Set Speed Limit
Mode 6 -> Set Acceleration Limit (range 0-9, 0=disable, 1=0.1g, 9=0.9g)
Mode 7 -> Set Deceleration Limit (range 0-9, 0=disable, 1=0.1g, 9=0.9g)
Mode 8 -> Speed (oF = KPH, On = MPH)
Mode 9 ->adjust Overspeed Timeout
Mode A -> Change PassWord Key (PWK)
Mode b -> Powersave
Mode C -> Clear Tamper Detect
*If Monitor Mode is selected, the OverSpeed Buzzer will sound for only 8 seconds or until the speed is reduced below the set allowed maximum. If the maximum allowed speed is again exceeded, the cycle will repeat. The OverSpeed counter will still increment the violation count. The purpose for this feature is to simply remind the driver that a desired speed limit has been exceeded. In the Enforcement Mode, the Buzzer stays on for as long as the vehicle is driven at a speed that exceeds the maximum allowed.
**When this mode is selected SpeedSpy will enter “SLEEP” mode 10 minutes after the engine is switched off. In this mode SpeedSpy uses very little battery power.
***This mode is selected by pressing the Mode button (White) to display 1 and then pressing and releasing the Enter button (Red). All Over Speed violations will be displayed in sequence with the actual highest speed displayed after each violation count.
NOTES:
In “SLEEP” mode, SpeedSpy can require up to 1 minute to resume normal operation after the engine is started. This mode cannot be entered if there are OverSpeed or Tamper incidents. They must first be cleared.
SpeedSpy will feel warm to the touch, this is normal. It has been extensively tested at an ambient temperature of 125 degree F. If operated in the “SLEEP” Mode, SpeedSpy will feel “Cool” to the touch. This is because it is consuming much less power.
Speed limits can be set from 1 to 99 Mph/Kph. Higher speeds of 100 to 250 Mph/Kph in 10 Mph/Kph increments with the right most digit flashing can also be set.
In the speed adjustment mode, holding the Mode button down will enable “Fast Forward” of the speed adjustment.
The OverSpeed timeout is a feature that lets the user determine for how long a period of time an OverSpeed violation can continue before a violation is logged. A maximum of 99 instances of violations can be recorded before the count cycles to 00.
Use of the clear OverSpeed count and Tamper status Mode will clear both and also extinguish the OS and td display.
To display the number of OverSpeed violations (OS), Select mode 1 and press and release the red Enter button.
If there are violations or Tampering, a low level “cricket” sound and OS and/or td display is produced when the vehicle ignition is turned off or the vehicle is not in motion.
The set-up modes cannot be entered while the vehicle is in motion. This is a safety precaution. A cigarette lighter power connection cable is supplied as a standard accessory to enable convenient SpeedSpy set-up and data display ONLY. It cannot be used for normal operation. SpeedSpy must be plugged into the Data Link Connector (DLC) to function.
NOTE:
When using the cigarette lighter power connection cable, the PassCode must be entered 2 times to get access to the set-up and control procedure.
The SpeedSpy can be moved from vehicle to vehicle without repeating the set-up procedure.
Optional DLC extender cables are available in varying lengths.
Speedspy Image (large view)
SpeedSpy and Key comparison |